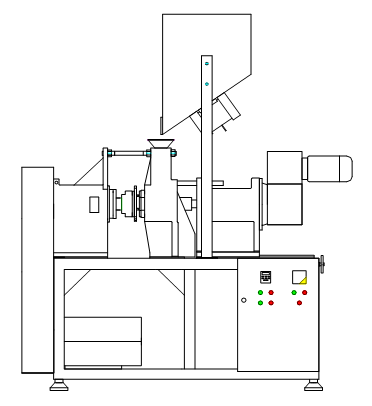
Shandong Arrow Intelligent Rotary Die Extruder is designed for the production of corn strips and corn strips. Its technological process has been tested for many years of snack food production. By mixing the corn dregs with a certain proportion of water and then entering the rotary head extruder, under the mutual squeezing and kneading action of the two rotating discs of the extruder, the corn dregs form an irregular twisted shape, and then the cutting knife removes it. Cut the product into the desired length. The corn noodles made can be seasoned after being fried, or baked and seasoned. Because of the crispy taste of the product, the equipment has become popular in various countries.
The extruder is mainly composed of rotating head cutting, screw extrusion, automatic feeding, cooling and blowing, and electric control system. When the rotating head cutting system is working, the motor drives the rotor head to rotate, and the rotor head is equipped with a fixed knife to cut the product and control the size of the product. In the screw extrusion system, the motor is driven by the frequency converter, and the speed of the screw is controlled through the reducer to squeeze the material. Under the action of temperature and pressure, the material is expanded into a molten state and extruded from between the two copper disks. To form the products we need. The automatic feeding system is under the action of gravity, the material falls vertically into the feeding port and is supplied to the extrusion system. The blowing system is used to transport the produced products to the next process through wind power. The electronic control system is used to control the start and stop operations of each motor. Protect the motor to prevent damage to the motor due to accidents.
model output:
Using standard corn flour to make standard corn fritters, the output is TS-1: 100-125KG/H, TS-2 200-220KG/H. The size of the corn strips is 8-30 mm long and the density is 17-26 kg/m3.
installation steps:
1 Before installation, please clean the screw and do not install the screw too tightly.
2 Remove the bolts that fix the rear base, and rotate the handwheel that controls the rear base.
3 Move the rear base about 37.5 cm away from the middle base to facilitate the insertion of the screw.
4 Put the screw in slowly and fasten the screw.
5 Expose the screw to the outside until the stator and rotor are installed.
6 Clean the stator and stator sleeve so that the stator can be easily placed in the sleeve.
7 Rub lubricant on the center of the stator.
8 Position the stator so that the bolt holes and bolts in the stator are in the center position.
9 Put the M8-6 bolt into the screw hole 20 cm.
10 Put the stator in the center of the stator base, put it in, and tighten the bolts.
11 Clean the rotor, rotor seat, cutter seat, positioning pins and positioning holes,
12 A certain number of blades are mounted on the cutter ring and clamped to the rotor.
13 Adjust the hand wheel at the back, turn the screw like the inner sleeve of the barrel, and control the distance between the screw tip and the copper plate to be about 35mm.
14 Use a 24 spanner to adjust the rotor head so that the gap between the two copper disks is controlled at about 2mm.
15 Install the discharge hopper and wait for it to start


